How Much Flour To Store Prepper Pantry? Having enough food is one of the most important things for surviving an emergency or evacuation. As we become more connected through technology, it is easy to access recipes anywhere you have internet service. With that, knowing how to prepare your own meals is very helpful in ensuring your continued survival.
Most preppers agree that having at least a month’s supply of food is necessary to ensure your family’s safety. Some go even further by stocking up on two years’ worth of supplies!
However, what people do not seem to realize is that every item in their panty needs to be accounted for and either stored properly or used up before they are wasted. This article will discuss some tips and tricks about how to manage your flour inventory.
I would like to emphasize again that while yes, baking with wheat products is possible without grain-face, baking with a limited amount of wheat can still prove disastrous for your diet if you are not prepared.
Long term food storage
When it comes to long term food storage, there are a few things that you need to take into consideration. The first is what type of food you want to store. This will determine the type of container that you will need to use. The second is how long you need to store the food. This will help you determine the amount of food that you will need to store. Lastly, you need to consider the space that you have available for your long term food storage.
The first thing that you need to do is decide what type of food you want to store. There are a few different types of food that you can store. The most common type of food that people store is dry food. This includes things like rice, beans, pasta, and cereal. These types of food can last for a very long time if they are stored properly. Another type of food that you can store is canned goods. This includes things like fruits, vegetables, and meat. These types of food can last for a shorter period of time, but they are still a good option for long term food storage.
The second thing that you need to do is decide how long you need to store the food. This will help you determine the amount of food that you will need to store. If you only need to store the food for a short period of time, then you will not need to store as much food. However, if you need to store the food for a longer period of time, then you will need to store more food.
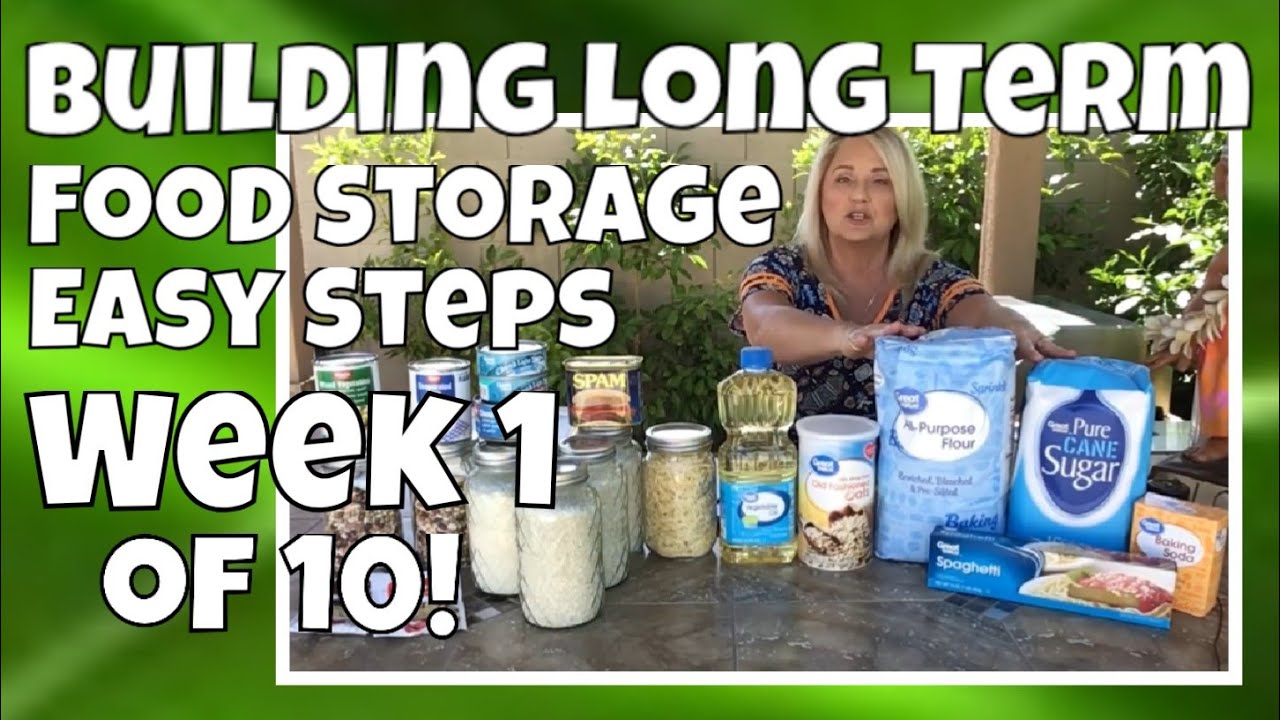
The third thing that you need to do is consider the space that you have available for your long term food storage. If you have a lot of space, then you will be able to store more food. However, if you do not have a lot of space, then you will need to store less food. You will also need to consider the type of containers that you will use to store the food. There are a few different types of containers that you can use. The most common type of container is a plastic container. These types of containers are very durable and they can hold a lot of food.
Once you have considered all of these factors, you will be able to determine the best option for your long term food storage.
Fresh flour
When it comes to baking, there’s nothing quite like the taste and smell of freshly milled flour. And while you can certainly find pre-milled flour at the store, there’s something special about milling your own flour at home.
If you’re new to flour milling, the process may seem a bit daunting at first. But with a little practice, you’ll be milling flour like a pro in no time. Here’s a quick guide to get you started.
First, you’ll need to choose the right type of grain for milling. Wheat is the most popular choice for milling at home, but you can also mill other grains like rye, barley, and oats.
Once you’ve chosen your grain, you’ll need to soak it in water for at least 12 hours. This helps to soften the grain and makes it easier to mill.
After the grain has soaked, drain it and add it to your mill. Start the milling process by slowly turning the handle. As the grain is milled, it will start to form a floury powder.
Once the desired consistency is reached, stop the mill and sift the flour to remove any large pieces.
And that’s it! You’ve now successfully milled your own flour at home. Use it in your favorite recipes and enjoy the taste of freshly milled flour.
How to make flour
When it comes to baking, one of the most important ingredients is flour. While you can buy pre-made flour at the store, it’s also easy to make your own. All you need is a grain mill or a blender and some patience.
The first step is to find a grain mill. You can find these at most kitchen stores or online. If you don’t have a grain mill, you can also use a blender.
Once you have your grain mill or blender, the next step is to choose your grain. You can use any type of grain, but wheat is the most common. If you’re using a blender, you’ll want to use a coarse setting so the grain isn’t pulverized.
Once you have your grain and your mill or blender, it’s time to start milling or blending. If you’re using a grain mill, you’ll want to pour the grain into the hopper and then turn the crank. It will take a few minutes to grind the grain into flour. If you’re using a blender, you’ll want to add the grain a little at a time and blend on a high setting. It will take longer to grind the grain this way, but it will be a finer flour.
Once your flour is ground, you can use it immediately or store it in an airtight container for later use.
How to store flour long-term
You might not think that flour is something that needs to be stored long-term, but if you bake regularly, you’ll want to make sure you have a good supply on hand. Here are some tips for storing flour long-term so that it stays fresh and usable.
The first thing to consider is what type of flour you’re using. All-purpose flour has a relatively short shelf life, so if you’re not planning on using it within a few months, it’s best to store it in the freezer. Bread flour and whole wheat flour have a slightly longer shelf life and can be stored in the pantry for up to a year.
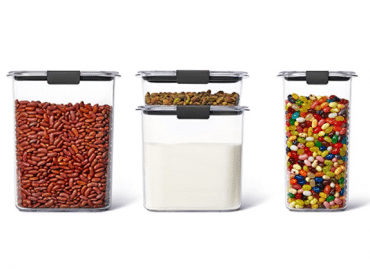
Once you’ve decided on the type of flour you’re going to store, the next step is to choose an airtight container. Glass jars with screw-on lids work well, as do plastic containers with tight-fitting lids. Be sure to label the container with the type of flour and the date so you’ll know when it was packaged.
When you’re ready to use the flour, take it out of the container and give it a good shake to loosen any clumps. If the flour has been stored in the freezer, it’s best to let it thaw at room temperature for an hour or so before using.
With these tips, you can be sure your flour will be fresh and ready to use whenever you need it.
Know your expiration dates
It is very important to know what kinds of foods have an expiration date. This includes wheat products such as bread, pasta, and rolls as well as other dried goods like rice and cereals.
Expiration dates are listed on package labels or company websites for each item. The most common time frame to worry about buying these items is one year past this date. But some may go beyond that!
It is best to check out the average shelf life of individual food items before investing in them. Some recipes require exact amounts of certain ingredients so it is better to get those tips beforehand instead of going way over or under needed supplies.
Store your flour in a cool, dry place
Having enough food is very important for surviving an emergency or a breakdown of services due to natural disasters or manmade events like a nuclear meltdown.
One of the most common resources that can be run out during a crisis is supplies such as flour and bread. Since we’re talking about stockpiling here, having too much extra supply can become wasteful. If you have more than what is needed, you will have excess food that you probably won’t need.
Before gathering all of your needed flours and baking mixes, make sure to know how many people each batch will satisfy so you don’t get too much left over. Also, remember that some recipes may call for less than the recommended amount, so keep an eye out for that!
We also recommend buying your baking mix brands rather than coupons because not only does it buy at regular prices, but you actually get quality ingredients that agree with our health goals.
Use only the amount you need
Stocking up on food is an excellent way to start prepping. But before you do, you must determine how much of each ingredient you have!
It’s very easy to run out of something when buying it at the grocery store or supply shop. The seller may advertise low prices, but they also often sell more than needed.
You don’t want to run out because then you would be forced to buy more expensive brands or even none at all.
By having a basic list of foods, you will know what products you have and how many of them there are. Then, as an advanced step, you can work on finding discounts online or in stores.
This article will talk about how much flour you should keep in your pantry.
Store wheat flour in your prepper pantry
While many people emphasize stocking up on food bars, dried fruits, and other nutritious foods, what is often overlooked are the two main components of most baked goods — flour and grains.
Grains can be categorized as either whole or refined. Whole grain foods are more nutritional due to their higher content of vitamins, minerals, and protein.
Whole Grain Foods | Refined Grains | Notes
Oatmeal, bread, rolls, pasta, rice, and crackers – these all contain some type of white refined starch that you will need to preserve for use in cooking. White potatoes and sweet potatoes are both excellent choices for baking.
You do not have to buy only those foods, but it is important to know how to maintain the shelf life of each one. In general, the longer they stay fresh, the better!
Storing Baked Goods
Most recipes call for around 2-3 cups (500–750 ml) of dry ingredients such as wheat flour, cocoa powder, sugar, etc. Depending on the size of your measuring cup, this could make a lot of difference when estimating how much food to store.
If you were to purchase twice that amount at the grocery store, you would end up with too much leftover product. It is best to get individual packages of each ingredient and then organize them by location to help you find what you want later.
Store all-purpose flour in your prepper pantry
Having an adequate supply of food is one of the most important things for surviving a major disaster or hunger crisis. Luckily, having a well-stocked grocery store room is not too difficult to do!
All-purpose flour is one of the most important staples that you will need in the early stages of any survival situation. This article’s aim is to tell you how much flour you should have ready in your prepping inventory. We will also talk about where to keep this key ingredient.
So let’s get started by talking about what sort of foods people usually eat when they are living off the land or eating only stored foods.
Store bread flour in your prepper pantry
Having enough wheat-based foods like pasta or dried, packaged noodles can be limiting if you are not familiar with how to prepare them. Wheat products such as pasta and dry noodle dishes are some of the most easily accessible survival food types you can have in your diet, and they do not require too much preparation time or special equipment needed to make them taste good.
Most people that start eating pasta know what to expect and what flavor variations exist. Since most people are already used to this food group, it is easy to get additional recipes for ways to use the leftover dough.
Many of these recipes call for more wheat products so having an adequate amount of wheat starch (the main component of the dough) can be determined by whether or not you have access to either baking or cooking powder/sugar. If you do, then you should have no trouble making enough paste for your recipe!
Bread flours are one of the two main types of wheat starch that we will discuss when talking about stocking up on wheat products. The other type of wheat starch is plain white rice starch which can sometimes be difficult to find due to its low usage compared to regular tapioca starch.
Does the need to have both types of wheat starch limit your ability to rotate your diet? Probably not, but it is important to keep this in mind while preparing our next batch of pasta.
Store yeast in your prepper pantry
Yeast is an integral part of making almost anything fermented, such as bread or beer. Luckily, there are some great ways to store it so that you will not run out during a food crisis!
Yeast can be sourced from several sources including grocery stores, vitamin shops, brewing companies, and even recipes themselves. Almost every cookbook has instructions for using yeast in baking.
There are two main types of yeast that most people use; active dry yeast and fresh yeast. Both work similarly but one must be re-activated before use.
Active dry yeast needs to be mixed into a liquid to activate it, then left to sit until frothy and visible. It will keep well stored in a sealed container at room temperature with a layer of liquid covering it.

Fresh yeast requires no activation other than being put into water or milk and set aside to foam and rise. It will eventually settle and form a thick gel that can be used like dried yeast in baking.
In both cases, after use, these yeasts should be discarded, and never kept for future uses. They will likely spoil and/or go bad if refrigerated.
Know the different types of flour
Since we’re talking about baking, there is one more major ingredient that bakeware includes- flour! The term “flour” can be confusing as it can vary in what type of starch or protein it contains. This article will go into great detail about some of the most common types of baking flour and how to use them.
A few basic guidelines are going to apply to all baking recipes unless otherwise stated:
Sugar is usually mixed with dry ingredients before adding liquids. This way, they can combine properly and taste better
Baking powder and soda act as a source of leavening, so if you have enough for either of these, you don’t need to worry about finding it elsewhere
If using salted butter, add half of your regular amount of salt to the mixture
Remember, when baking, keep an eye on colors! Ovens can get hot, which may affect color intensity.