Introduction
Bread has been a staple food for centuries and is enjoyed by people all over the world. Canning bread is a great way to enjoy your bread for a long time. It is also a great way to make sure that you have bread on hand in case of an emergency.
What You Need to Know Before You Start
If you’ve never canned bread before, you might be wondering what all the fuss is about. Canning bread is a great way to preserve bread so that it lasts much longer than if you simply stored it in the pantry. Canned bread also tastes great and can be used in many different recipes. However, there are a few things you need to know before you start canning bread. In this article, we’ll go over everything you need to know so that you can start canning bread with confidence.
The Basics of Canning
Canning is a method of preserving food in which the food contents are processed and sealed in an airtight container (jars or cans). Canning provides a shelf life typically ranging from one to five years, although under specific circumstances it can be much longer. A freeze-dried product has a shelf life of over 25 years.
The process was first developed in the 18th century by the French confectioner Nicolas Appert. The process was later improved by others, including John Merton, who developed sealing wafers, and Henry Spencer, who developed a more reliable sealing process.
Canning Bread
Bread is a perishable item, which means that it can go bad quickly if it’s not stored properly. Canning bread is a great way to extend its shelf life and keep it fresh for longer.
There are two methods of canning bread: the hot water bath method and the pressure canning method. Both methods are equally effective, but the pressure canning method is faster.
If you’re using the hot water bath method, you will need to preheat your oven to 425 degrees Fahrenheit. Place your bread on a baking sheet and bake for one hour. Remove the bread from the oven and let it cool completely.
Once the bread is cooled, cut it into slices that are about 1 inch thick. Pack the slices into jars, leaving about 1 inch of headspace at the top of each jar. Wipe the rims of the jars clean and screw on the lids securely.
Place a rack in the bottom of a large pot and fill it with water. The water should be about 2 inches deep. Place the jars on the rack and bring the water to a boil. Boil for 10 minutes, then turn off the heat and let the jars sit in the hot water for another 5 minutes.
Remove the jars from the pot and let them cool completely before storing them in a cool, dark place. The bread will keep for up to one year when canned using this method.
If you’re using the pressure canning method, you will need to preheat your oven to 375 degrees Fahrenheit. Place your bread on a baking sheet and bake for 30 minutes. Remove the bread from the oven and let it cool completely before slicing it into 1-inch thick pieces.
Pack the sliced bread into jars, leaving about 1 inch of headspace at the top of each jar. Wipe the rims of the jars clean and screw on the lids securely.
Cakes and Bread in Jars – Are They Safe?
Do you love the taste of freshly baked bread or cake, but hate the idea of all the mess that comes with baking them? If so, you’ll love the idea of baking your treats in jars!
Not only is this method of baking super easy and mess-free, but it’s also a great way to ensure your cakes and bread are cooked evenly and come out perfectly every time. Plus, baking in jars is a great way to show off your baking skills to friends and family – they’ll be amazed at how professional your bakes look!
So, what are the safety concerns when it comes to baking cakes and bread in jars?
Well, the main concern is that the jars could break if they’re not properly heat-resistant. However, as long as you use jars that are designed for baking (such as Mason jars), then you shouldn’t have any problems.
Another safety concern is that you need to be careful when removing the hot jars from the oven. Make sure you use oven gloves and place them on a heat-proof surface to cool, such as a wire rack.
Finally, you need to make sure you clean the jars thoroughly before you use them again. Any residue from the previous bake could contaminate your next one, so it’s important to give them a good wash.
So long as you follow these simple safety tips, baking in jars is a great way to enjoy your favorite treats without any of the hassles!
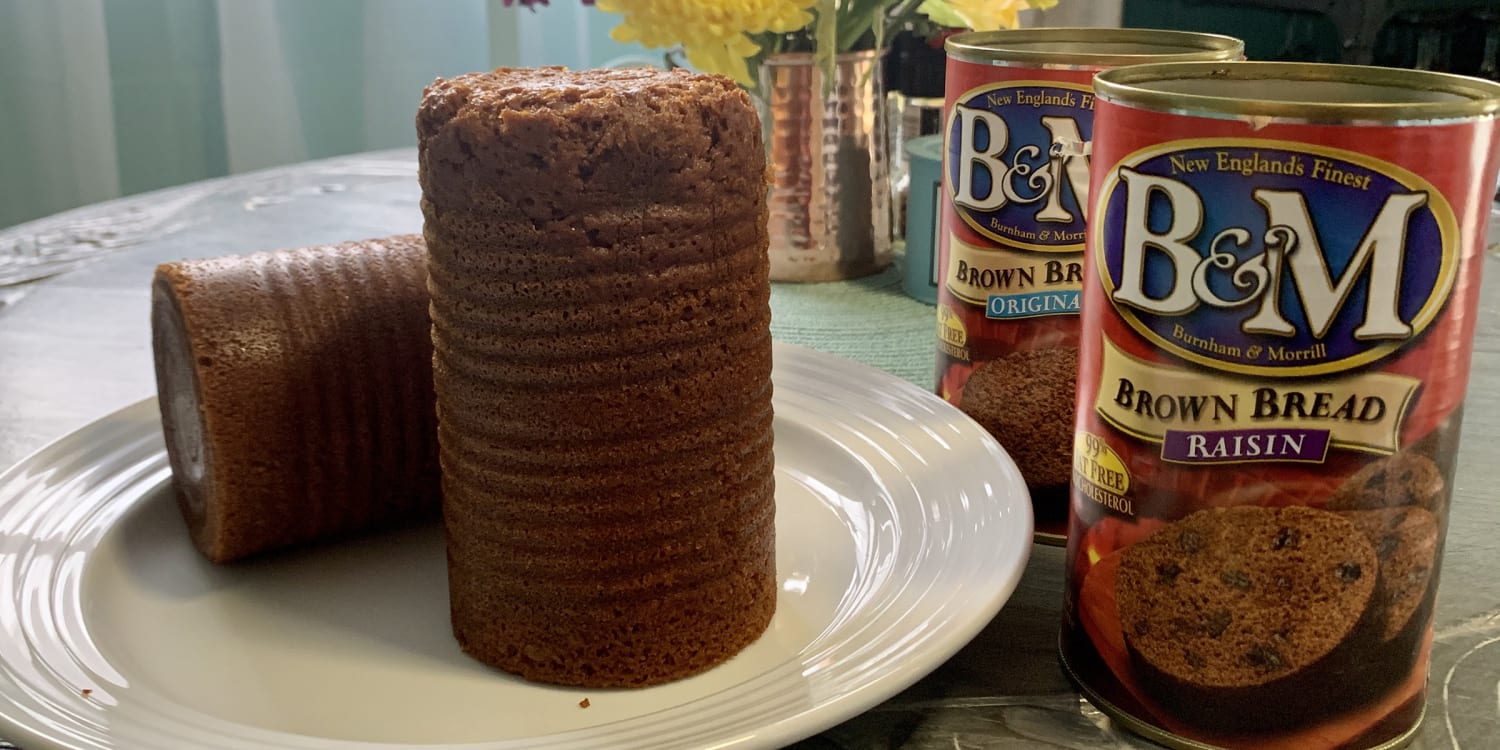
Banana Nut Bread Baked in a Jar
Banana Nut Bread Baked in a Jar is the perfect way to show someone you care. Made with ripe bananas, walnuts, and cinnamon, this moist and delicious bread is the perfect way to show your loved ones how much you care.
Banana Nut Bread is the perfect way to show someone you care. Made with ripe bananas, walnuts, and cinnamon, this moist and delicious bread is the perfect way to show your loved ones how much you care.
This Banana Nut Bread is made with ripe bananas, walnuts, and cinnamon. It is moist and delicious, and the perfect way to show your loved ones how much you care.
The Process of Canning Bread
To begin, sterilize your canning jars and lids. You will also need a large pot, a canning rack, and a bread pan. Preheat your oven to 350 degrees Fahrenheit. Place the bread pan on the canning rack in the pot. Fill the pot with water, making sure that the water level is at least an inch above the pan. Place the jars in the pot and boil for 10 minutes.
Step One: Prepare the Bread
The first step in canning bread is to prepare the bread. If you are using a recipe, follow the recipe to make the dough. If you are not using a recipe, mix together flour, yeast, salt, and water to form a dough. Knead the dough for about 10 minutes to form a sticky, but smooth and elastic, ball. Allow the dough to rise in a warm place until it doubles in size, which should take about an hour.
Once the dough has doubled in size, shape it into one or two loaves and place it on a greased baking sheet. Allow the bread to rise for another 30 minutes while you preheat the oven to 350 degrees Fahrenheit.
Bake the bread in the oven for 30-40 minutes, until it is golden brown. Remove the bread from the oven and allow it to cool completely on a wire rack before proceeding to step two.
Step Two: Fill the Canner
Once you’ve prepared your canner, it’s time to fill it with water. The water level should be high enough to cover the jars by at least an inch or two. If you’re using a pressure canner, follow the manufacturer’s instructions for how much water to use.
Next, place the jars of bread into the canner. Be careful not to splash any water onto the bread, as this could cause mold to grow.
Once all of the jars are in the canner, put the lid on and turn up the heat.
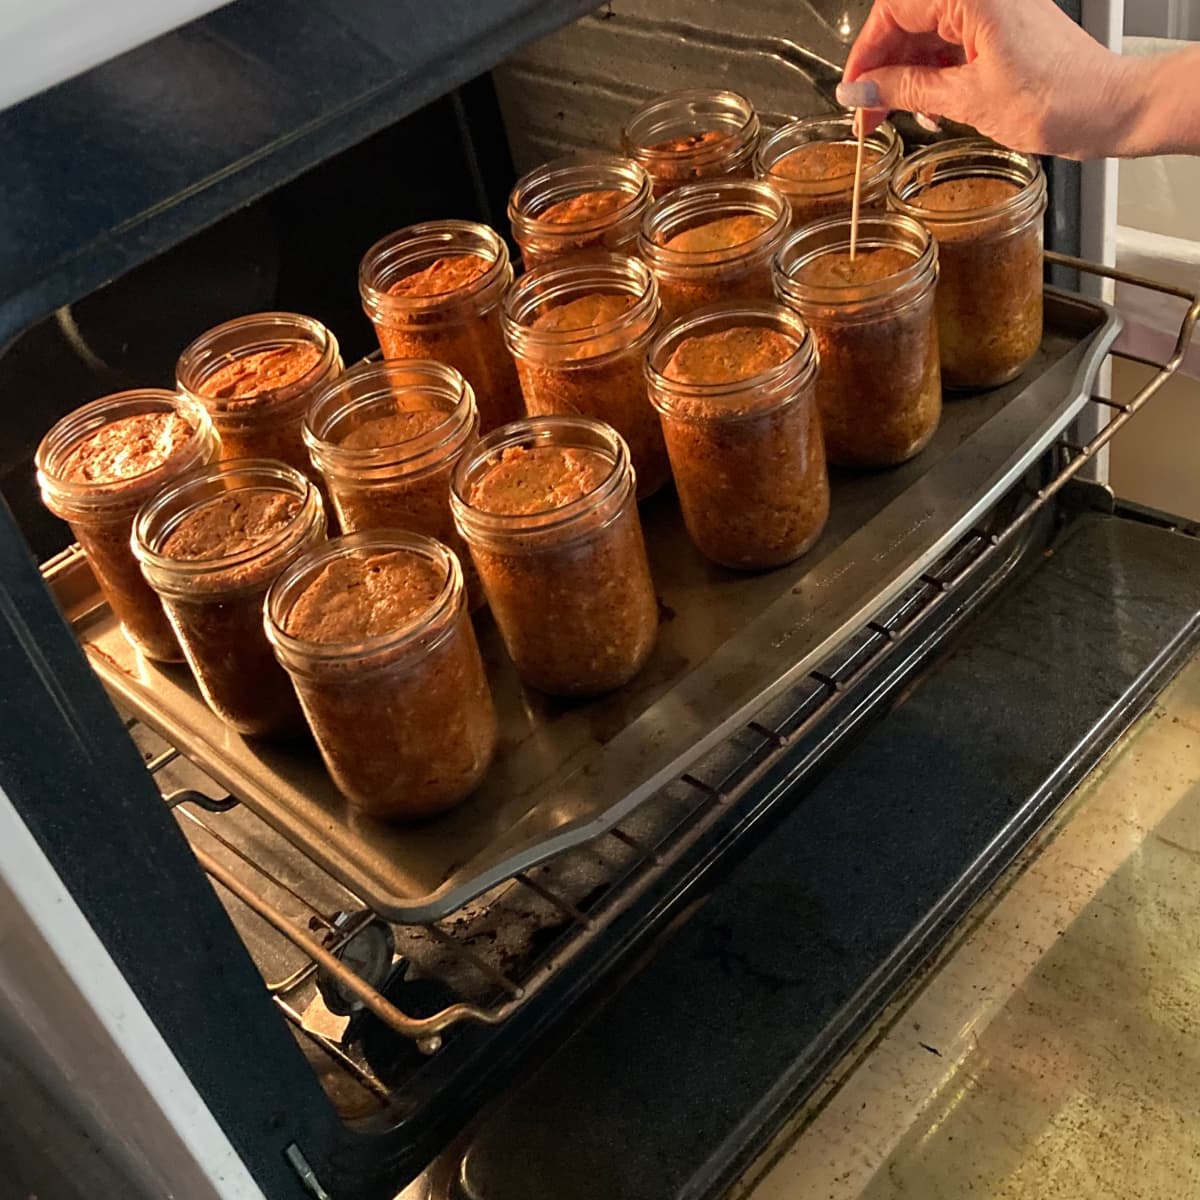
Step Three: Process the Bread

Processing the bread is done by sealing the jars tightly and providing a water bath for boiling. This step is important, as it prevents bacteria from growing in the bread and causing spoilage. The boiling water also kills any wild yeast or mold spores that may be present on the surface of the bread. To process the bread, follow these steps:
- Fill a large pot or canning kettle with water and bring it to a boil.
- Carefully lower the jars of bread into the boiling water, using a canning rack or a trivet to keep them from touching the bottom of the pot.
- Boil for 30 minutes.
- Remove the jars from the pot and place them on a towel to cool. Do not tighten the lids until they are completely cooled.
Canning Bread Tips
Storage
Bread can be stored on the counter, in the fridge, or in the freezer. For long-term storage, it’s best to keep bread in the freezer.
Bread can last for up to 2 weeks on the counter, but it will stale more quickly if it is not stored properly. Store bread in a cool, dry place and in an airtight container to keep it fresh. If you plan to eat bread within a few days, there is no need to refrigerate it.
Bread can be stored in the fridge for up to 1 week. Place bread in an airtight container or zip-top bag and store it in the fridge. Bread may become stale faster when stored in the fridge, so be sure to eat it within a week.
Bread can be stored in the freezer for up to 6 months. Wrap bread tightly in plastic wrap or place it in a freezer-safe bag before freezing. When you’re ready to eat the bread, thaw it overnight in the fridge or place it in a 350°F oven for about 10 minutes.
Shelf Life
Bread can last for about 4-5 days if stored in a cool and dry place. If you want to store bread for a longer period of time, you can freeze it. Homemade bread can last for 2-3 months in the freezer, while store-bought bread can last for up to 6 months.
Bread can also be canned. Canned bread has a shelf life of 1-2 years and is a great way to store bread for a long period of time.